

One of the most frequently asked technical questions we hear, is “If I order a vent for my kiln, how will I install it?”. Many times that phrase is accompanied by a slight nervousness, and that is completely understandable! If someone were to tell me to approach my shiny, new, several-thousand-dollar-piece-of-equipment with a drill, I would raise an eyebrow as well. But never fear! In the Clay-King warehouse, we attempt to drill most kilns for a vent, if they are ordered with one. I’ve put together a short tutorial, so that you can do yours with a little ease of mind. Some kilns have different hole patterns that you will need to know, consult your operating manual to find the exact pattern for your kiln.
Things you’ll need:
- Tape Measure
- Drill
- 3/16th drill bit
- Marking Pencil
- Sponge
Supporting Materials
- Skutt EV2 Manual
- Skutt EV2 Install Video
- L&L Vent Sure Install Video
- L&L Vent Sure Instructions
- Orton Vent Master Manual
Step 1: Prep and Measure
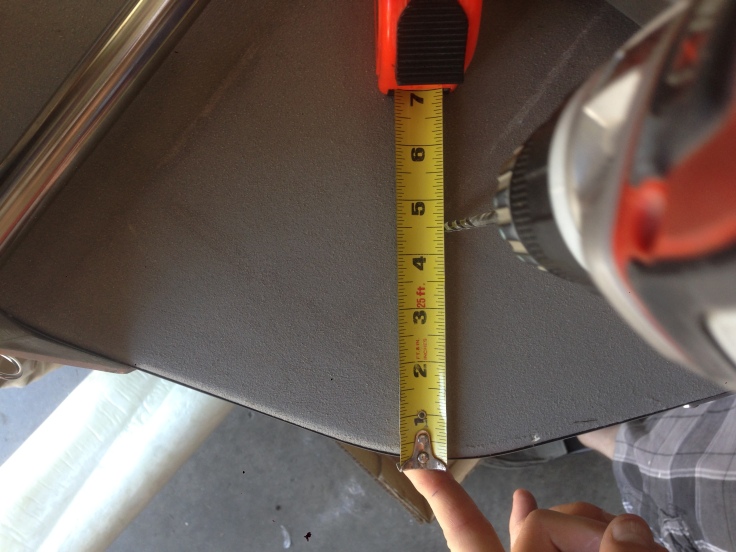
If your kiln is new, you will want to take it out of the box, and open the lid. You’ll need to measure the inside diameter of the kiln (from inside wall to inside wall). This will help in making your calculations. For this Tutorial, we used a Skutt KM1027. This kiln is 23 inches wide.


Step 2: Mark and Drill the bottom.


Take the diameter and half it, in this case we come up with 11.5 inches. Take your drill bit, and place it next to the ruler. With the drill in REVERSE pull the trigger and put slight pressure on the drill until it goes all the way through. The drill bit going in reverse helps avoid cracking and going too fast.


From the first hole measure 1 and 1/2 inch away, and drill another hole, then again to complete a triangle pattern in the center of the bottom. Directly under these holes is where the cup of the vent will be placed.
Step 3: Drill the lid
We are going to drill 3 holes in the lid as well. For this step, measure your kiln brick and add 2 inches. This kiln has 2.5″ brick, so we will drill our hole at the 4.5″ mark. DO NOT DRILL OVER THE THERMOCOUPLE. the vent draws in air slightly, and can impact your thermocouple’s temperature reading making your elements work harder to achieve temperature, which will wear them out faster. To ensure you do not drill over the thermocouple, simply avoid drilling on the side of the kiln that has the control box. The lid lifter and bar divide the lid into quadrants; use the three quadrants that do not have the control box in them to drill your holes. Again with the drill in reverse, put slight pressure until the hole is complete.


Repeat this process on 2 other adjacent sides of the kiln. Once finished, use a slightly damp sponge to wipe away any brick dust.
Congratulations! Your kiln is vent-ready. From this point, installing the vent itself is a breeze. Follow the instructions in your Vent Kit, or watch This Video here for more information on installing your vent system.

Great idea. Thank you.
LikeLike
Drill on two other sides of the kiln… what? What two sides? How high up? You just defeated the purpose of this How To instruction by dumping out without completing the project. Recommendation, find someone to write complete How To, or don’t have one at all.
LikeLike
Thank you for your feedback, I have edited the section regarding drilling two additional holes to make it more clear.
LikeLike